How to Make the Flakiest Buttermilk Pie Crust
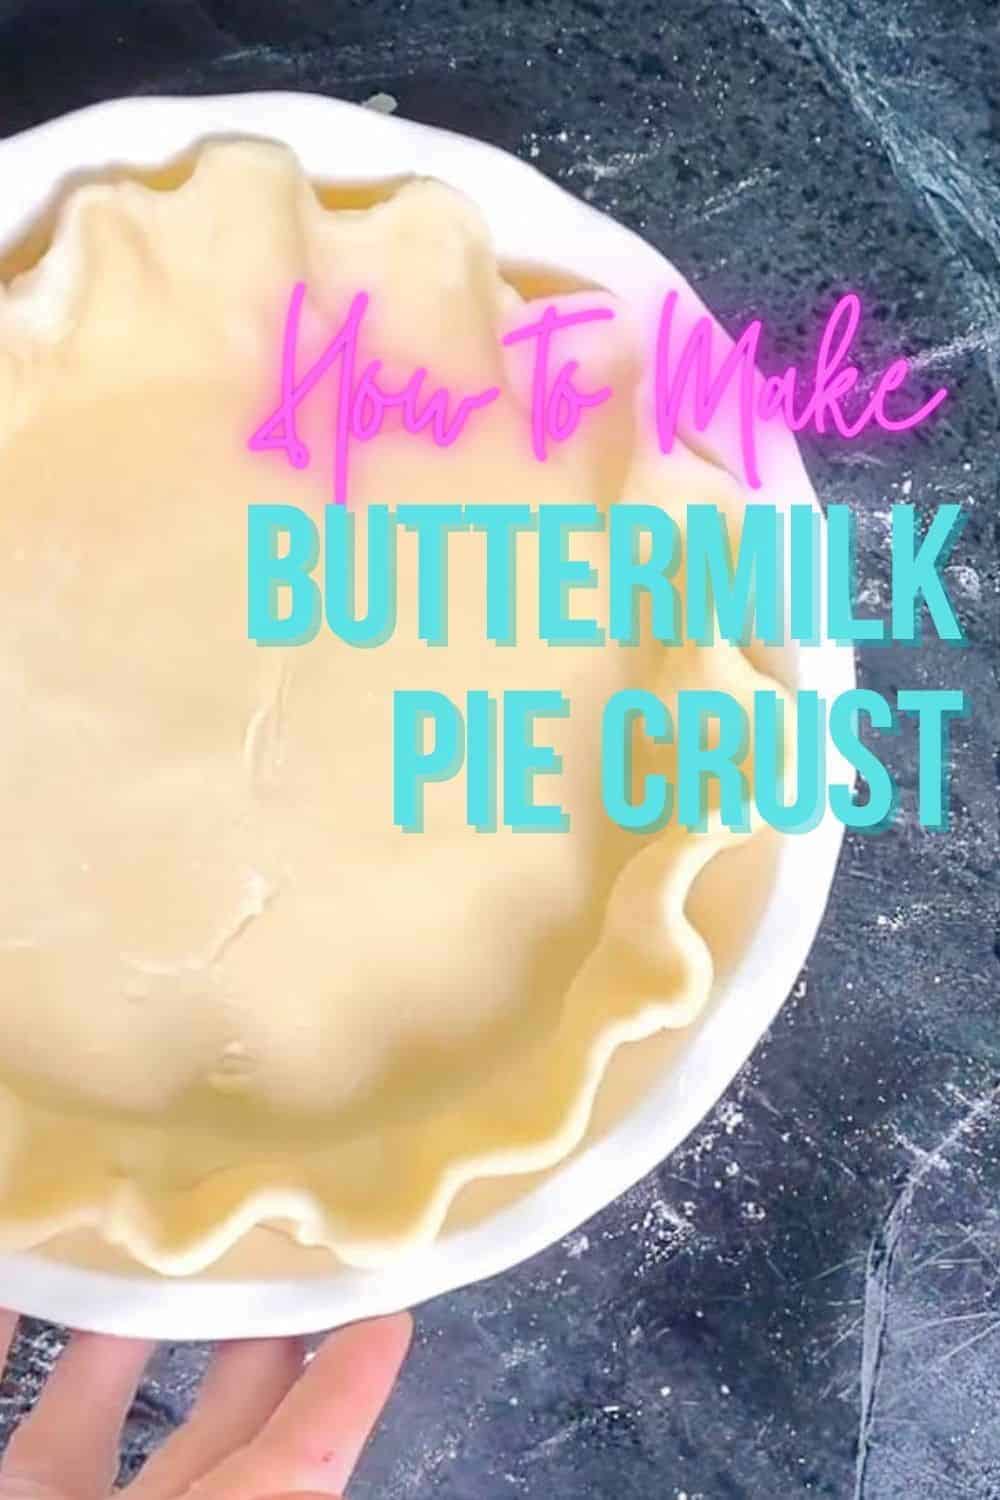
This easy buttermilk pie crust is perfectly flaky and flavorful. It’s my go-to pie crust recipe for most pies. I also use this pie dough recipe for hand pies and empanadas. It bakes up tender and flaky every single time.
When I was a kid, I absolutely hated pie crust. Well, it turns out, I just needed the right recipe! I spent many years searching for the perfect pie crust recipe. Now I have two main pie crust recipes that I use over and over: this one and my All-Butter Pie Crust.
Both of these pie dough recipes can be made in a mixing bowl OR in a food processor.
I almost always use the food processor when I’m making pie dough just because it’s so easy.
What You’ll Love About This Buttermilk Pie Crust Recipe
- Easy: This pie crust is so easy to make. It doesn’t require any baking expertise to make a bakery-style pie.
- Flaky: If you follow the instructions in this post, you’ll get perfectly flaky pie crust every single time.
- Completely No-Fail: This pie crust is completely fail-proof. Seriously, you can’t mess it up!
- Use for savory or sweet pies: This is a flaky pie crust that is delicious for quiches, pot pies, pumpkin pies, apple pies, and even for making sweet OR savory hand pies.
Foodology Geek Recipe Tips
This recipe is almost the same as my All-Butter Pie Dough Recipe except that you’ll use buttermilk instead of ice water. I find that the buttermilk gives this pie crust a lot more flavor.
Also, because there is a higher concentration of milk sugars, the crust bakes up to a lovely, deep golden brown.
Ingredients Needed For Making Pie Dough
- Flour: All-purpose flour. Flour is the base of the pie dough, so use your favorite. I am a huge fan of King Arthur Brand.
- Sugar: A little bit of granulated sugar is used in pie crust, mostly to help with the browning. You don’t really want pie crust to be sweet. Even when I make a savory pie or quiche, I add a tiny bit of sugar.
- Salt: Salt adds flavor to the pie crust.
- Butter: Always use high-quality unsalted butter. I love Pulgra butter. It’s best to use unsalted butter when baking so that you can control the salt content.
- Buttermilk: I like to use full-fat buttermilk in my pie crusts.
Steps to Make the Best Pie Crust
I honestly almost always use my food processor to make my pie dough. It’s easy and it always comes out perfect! If you don’t have a food processor you can use your fingers or a pastry cutter to mix the butter and flour.
Another pro tip that I use all the time is to freeze the butter until it is ice cold and then grate the butter using a cheese grater.
PRO TIP: The secret to flaky pie crust is to have tiny chunks of ice-cold butter distributed throughout the dough and to chill the crust completely before baking it.
Step-by-Step Instructions
How to Make Pie Dough in the Food Processor
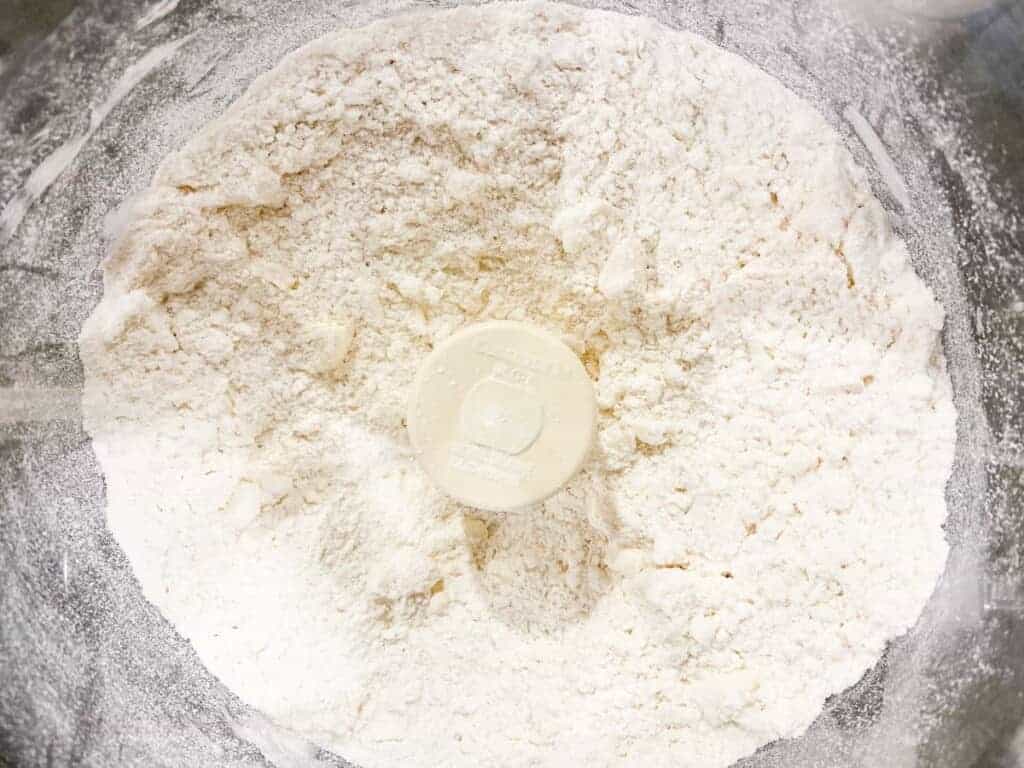
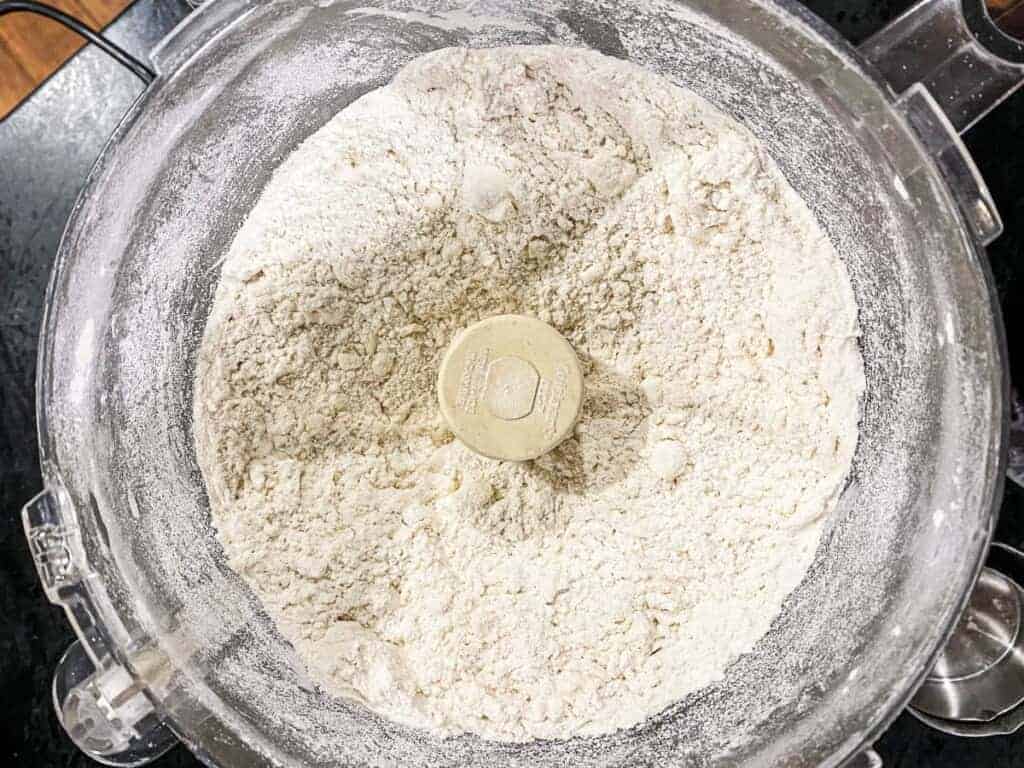
Step 1: Add the dry ingredients.
Add the sugar, flour, and salt to a food processor bowl that is fitted with the blade attachment.
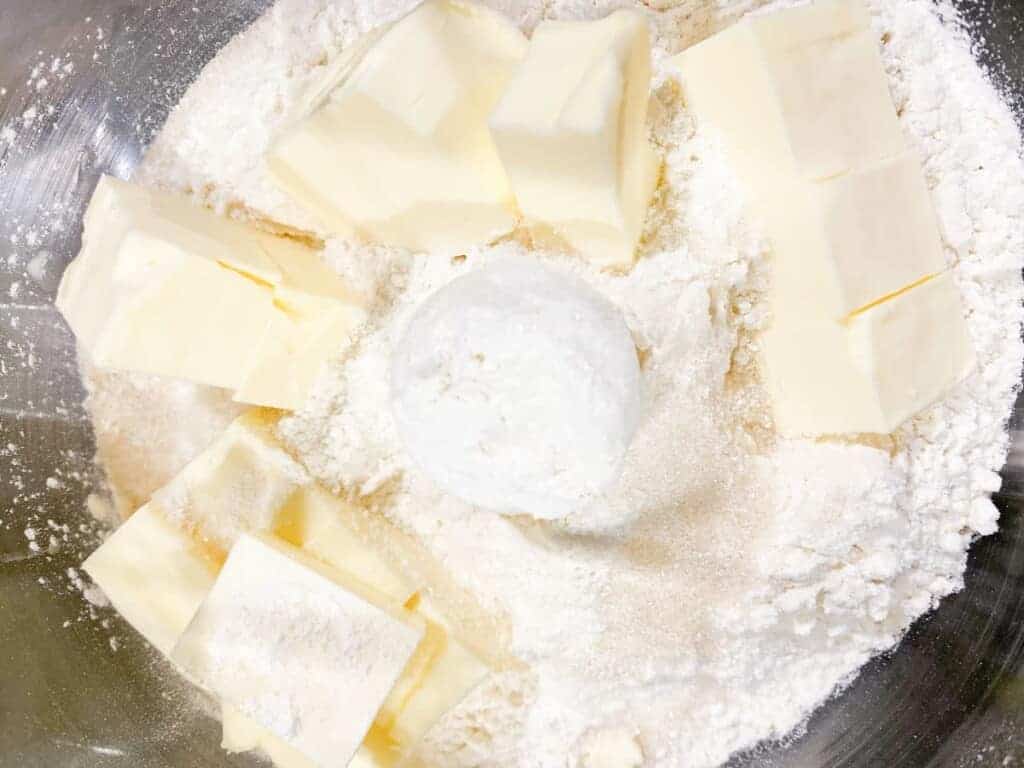
Step 2: Keep the butter cold!
Add the diced or grated ice-cold butter to the large bowl of the food processor.
Step 3: Incorporate the butter.
Pulse the butter and flour mixture together until you have a coarse, sandy texture.
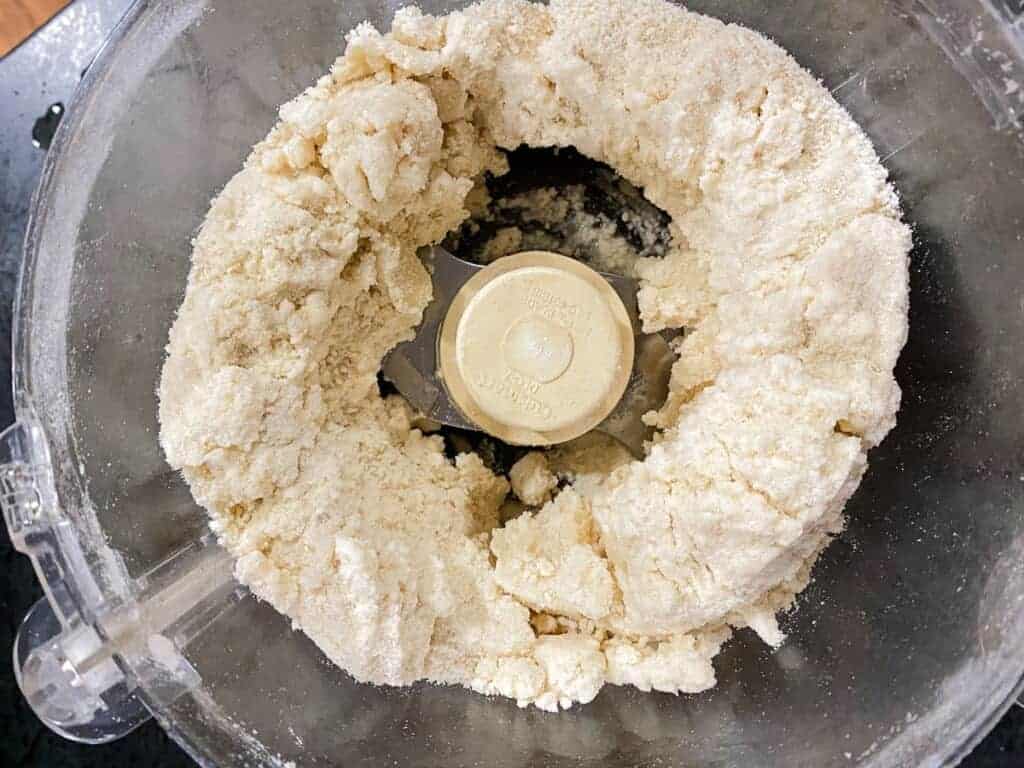
Step 4: Add the buttermilk.
Measure out 1/2 cup of buttermilk, and then turn the food processor on. Do this step quickly. With the machine ON, start to add the buttermilk, about a tablespoon at a time, until the pie dough starts to come together.
You might not use all of the buttermilk. Pulse a few more times.
Step 5: Press the dough together.
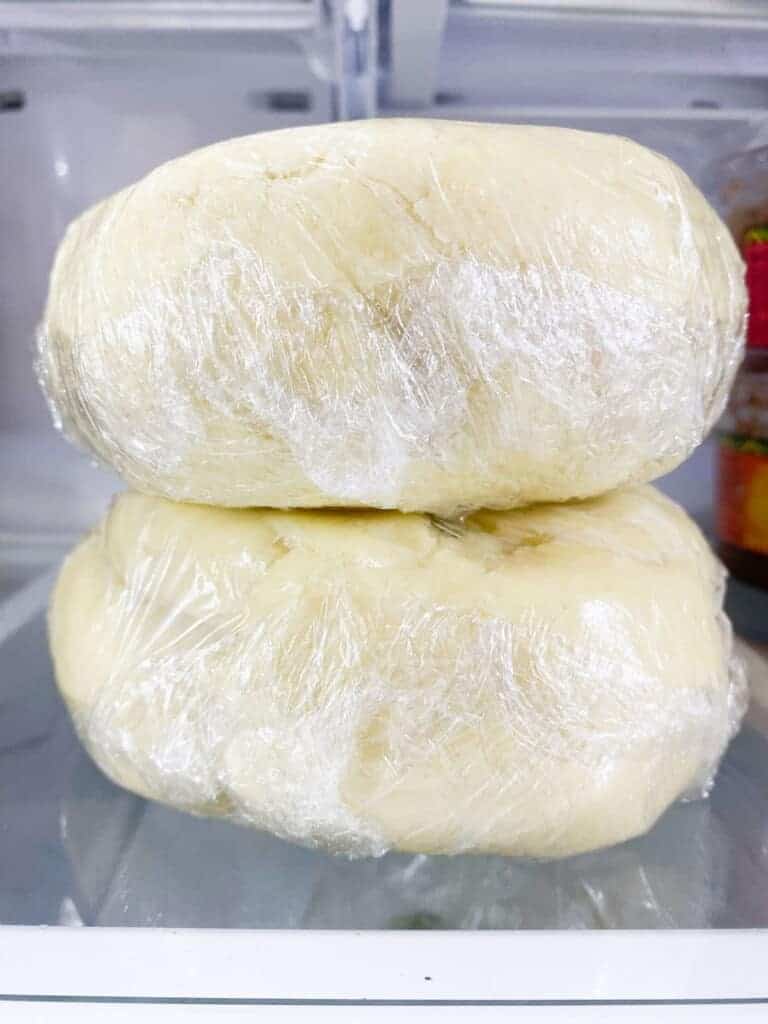
Dump the loose dough out onto the counter and use your hands to press the dough together into 2 discs.
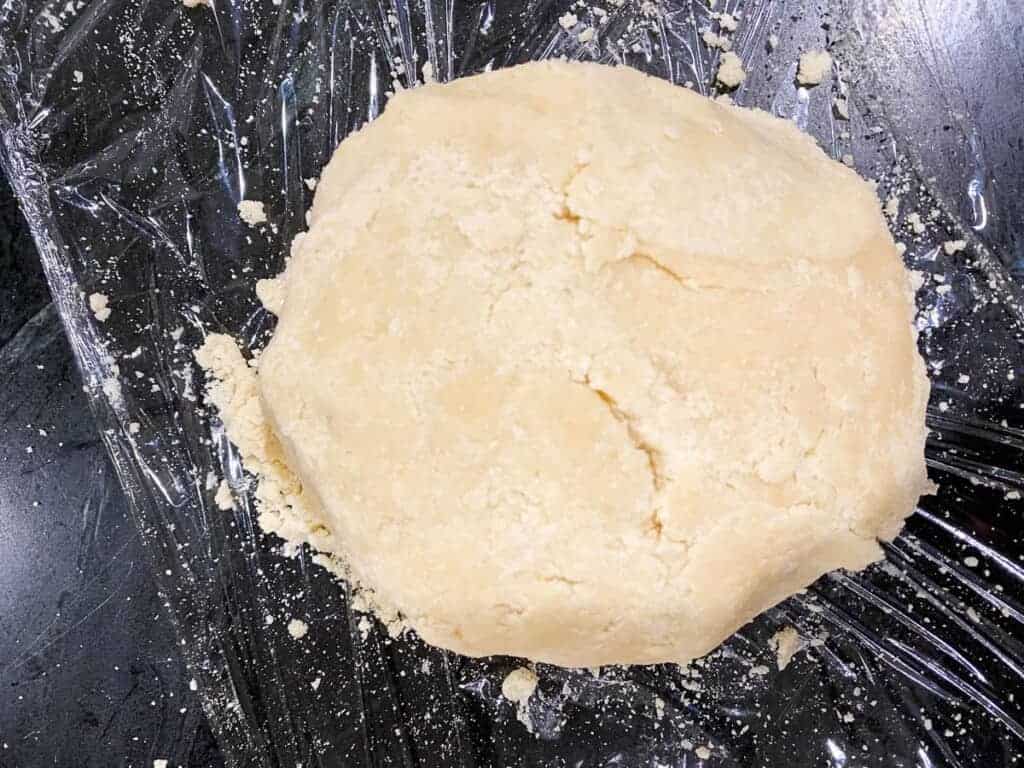
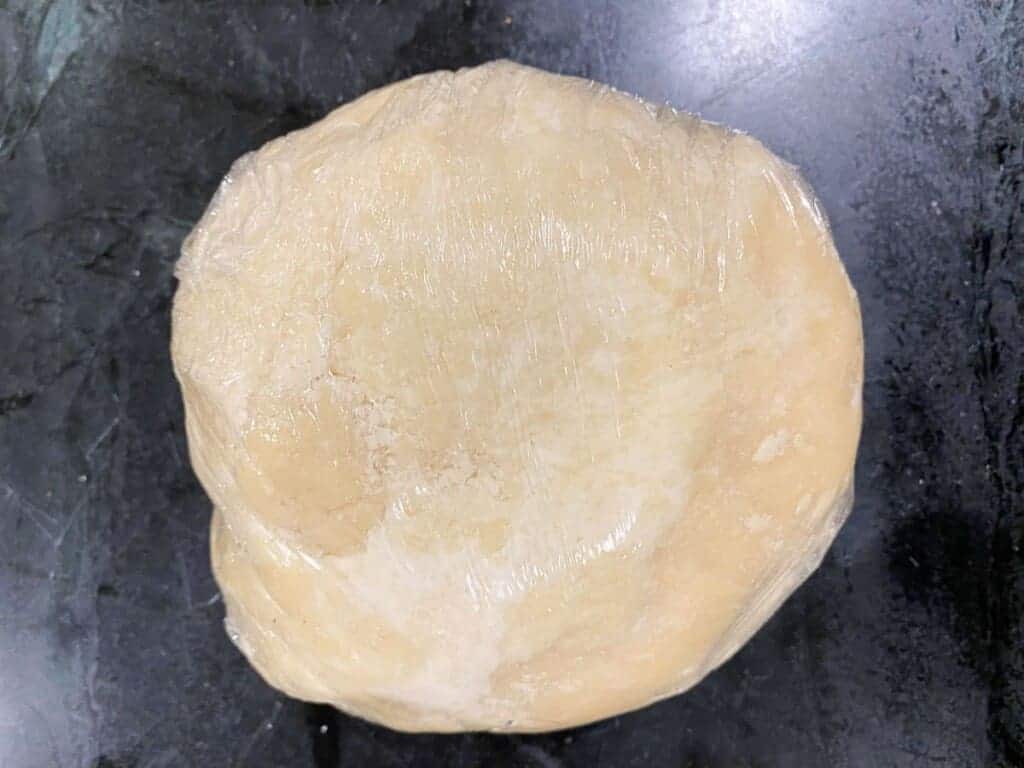
Step 6: Wrap and chill.
Wrap the pie dough tightly in plastic wrap and store in the fridge for at least 2 hours, up to overnight. Pie dough freezes great! Don’t be afraid to make a double batch and freeze some for later.
How to roll out pie dough
Once you have thoroughly chilled your pie dough, you will want to take it out of the fridge and let it sit for about 20 minutes before you start to roll it out.
Step 1: Place the chilled pie dough on a lightly floured surface.

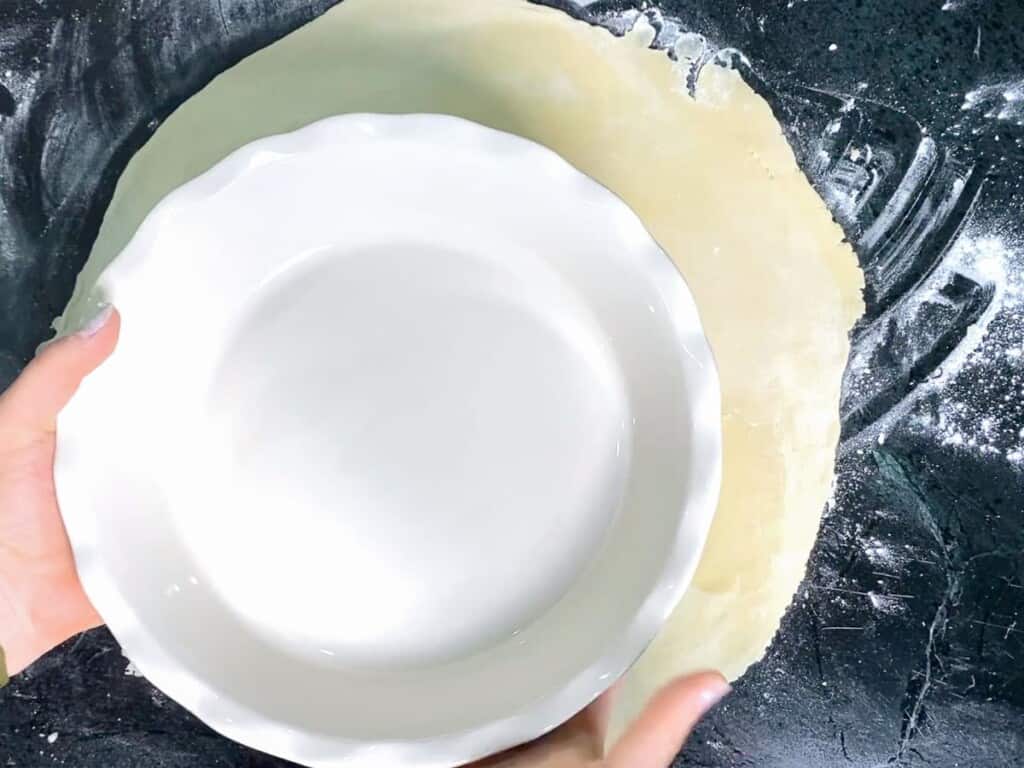
Step 2: Roll out the pie dough with a rolling pin.

Step 3: Make sure that the pie dough is large enough to give you a little bit of overhang around the edge.
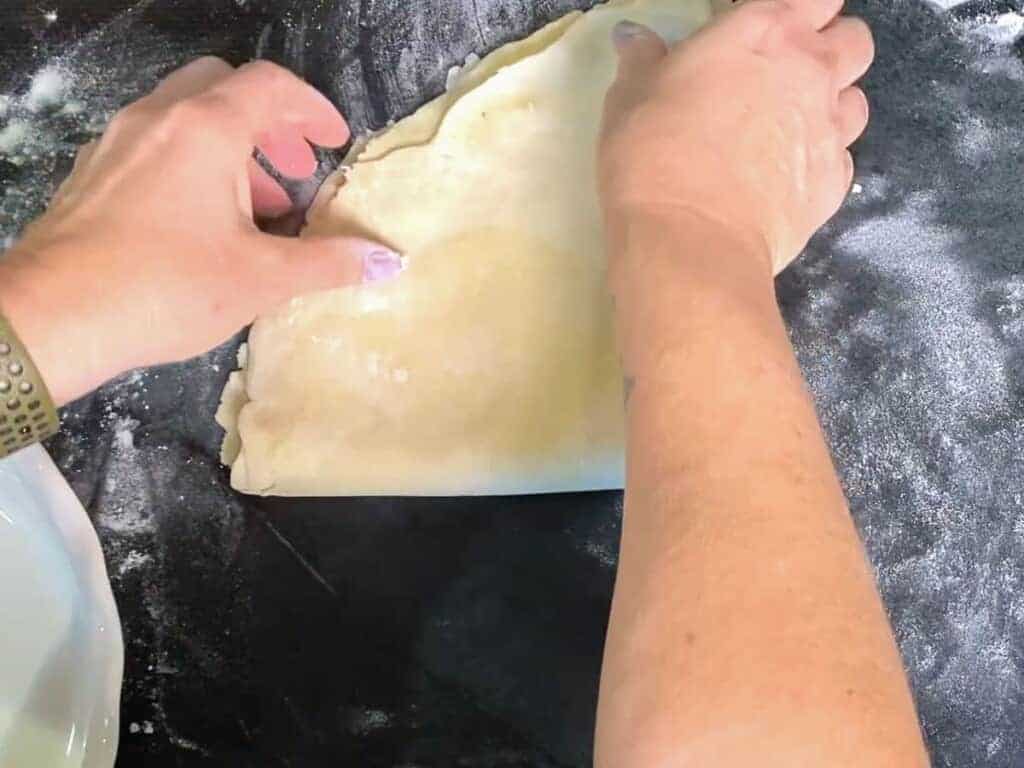
Step 4: Fold the pie dough in half…
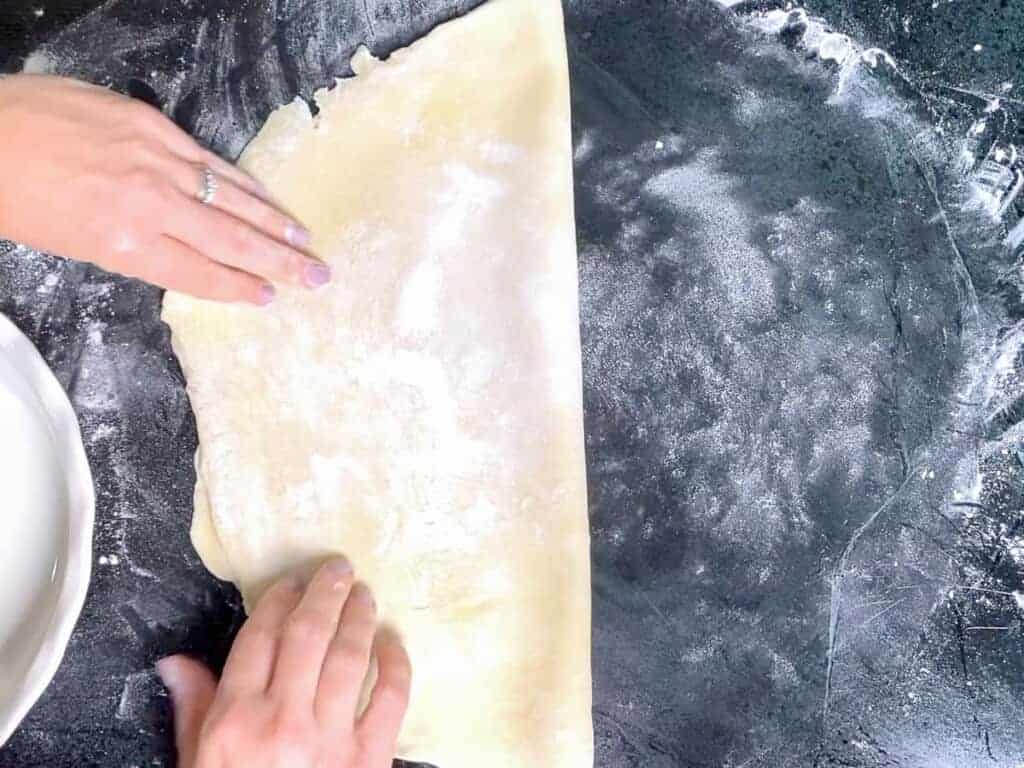
Step 5: …and then in half again.
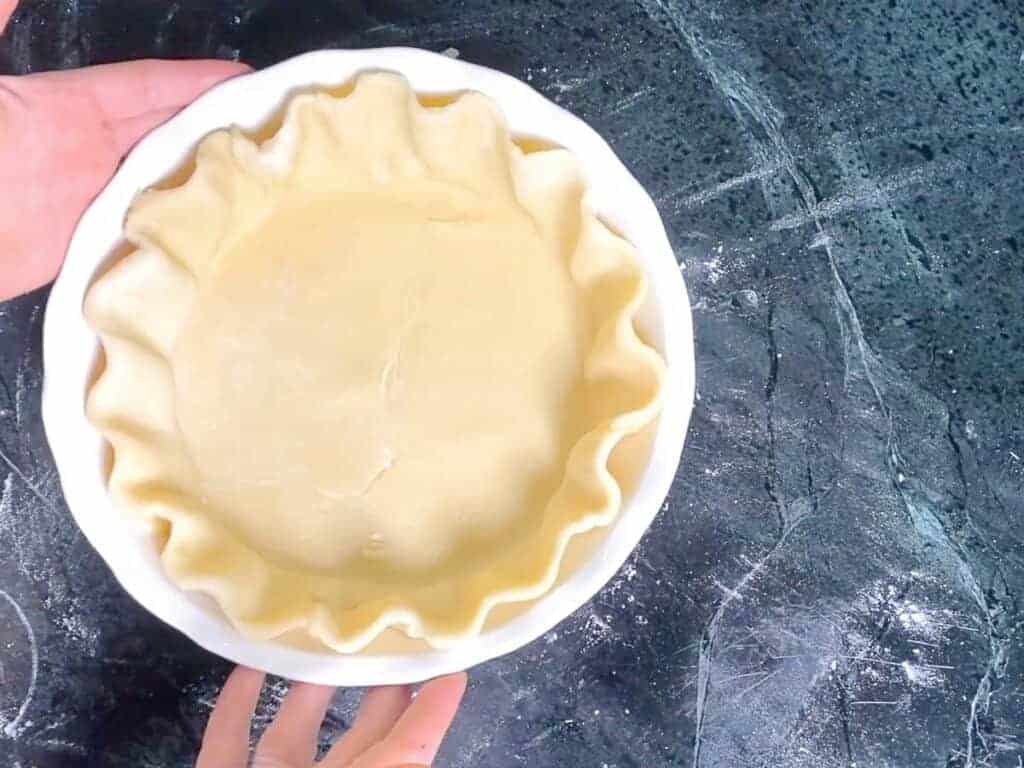
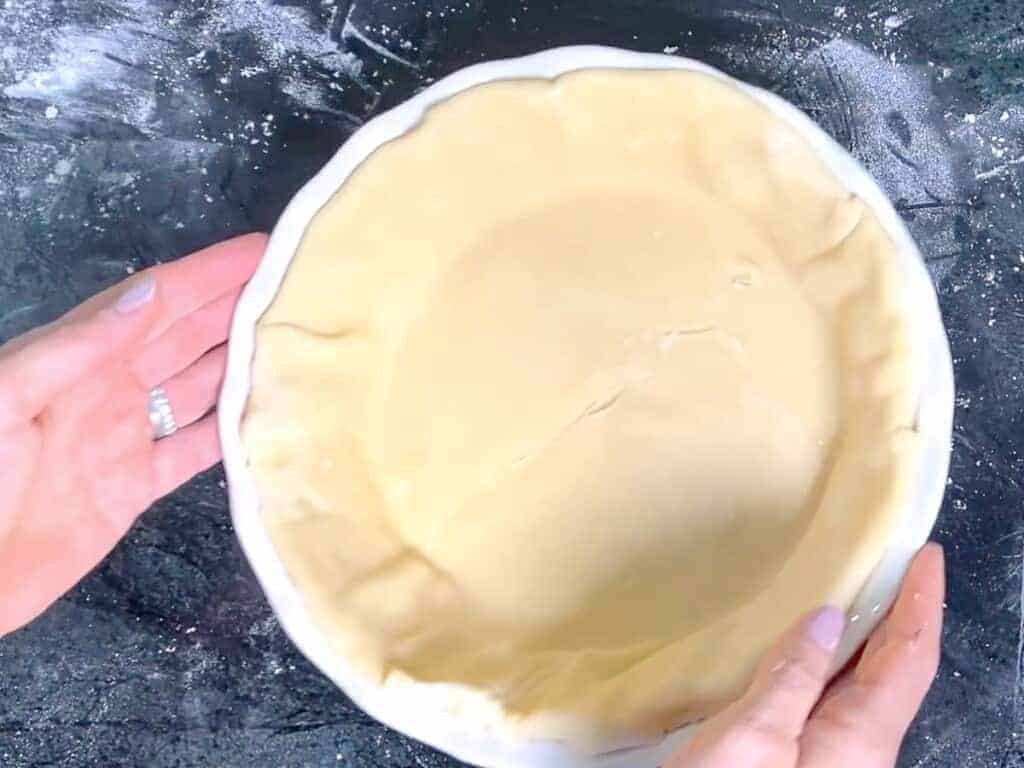
Step 6: Place the pie dough into the pie dish.
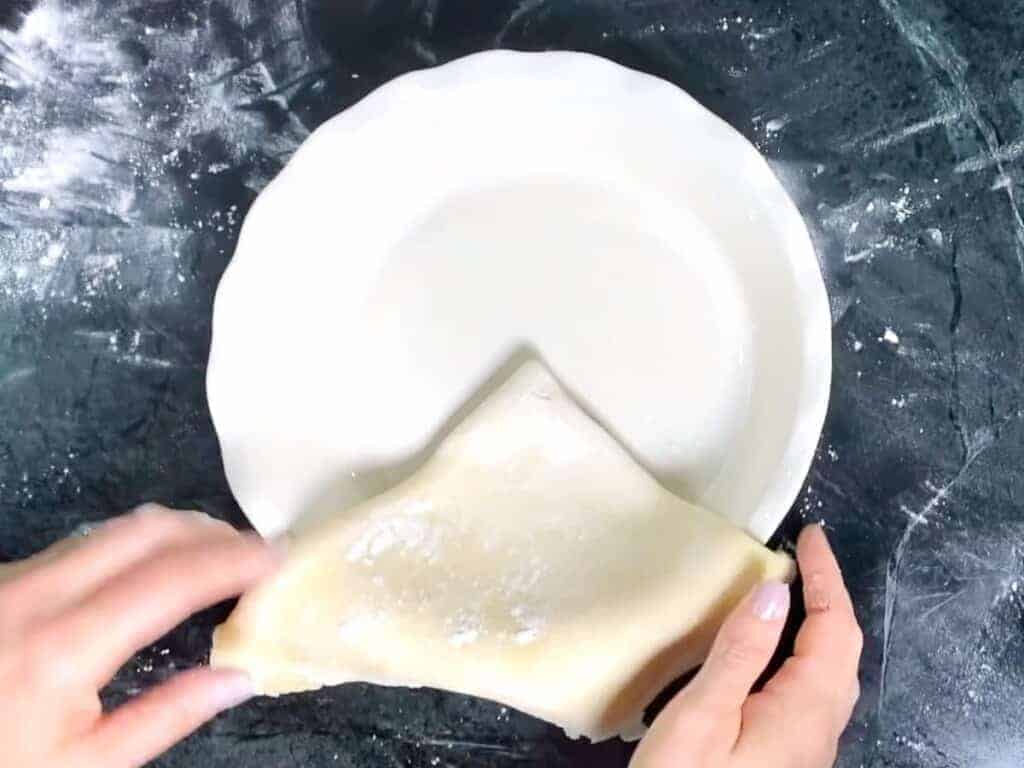
Step 6: Unfold the pie dough in the pie dish.
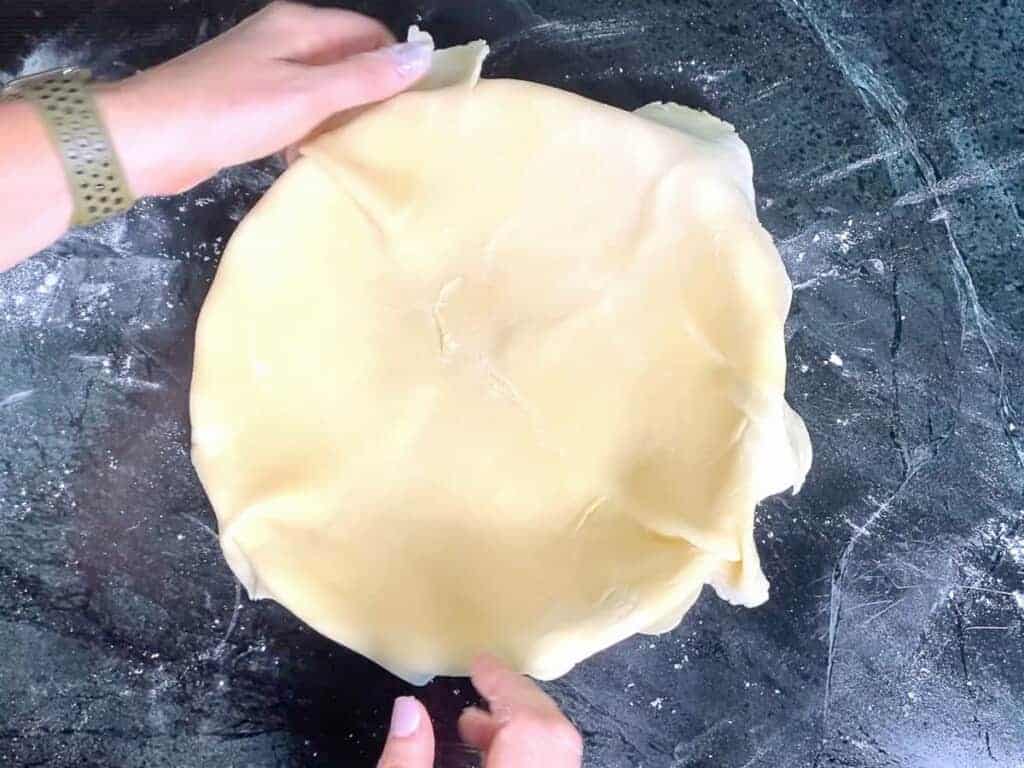
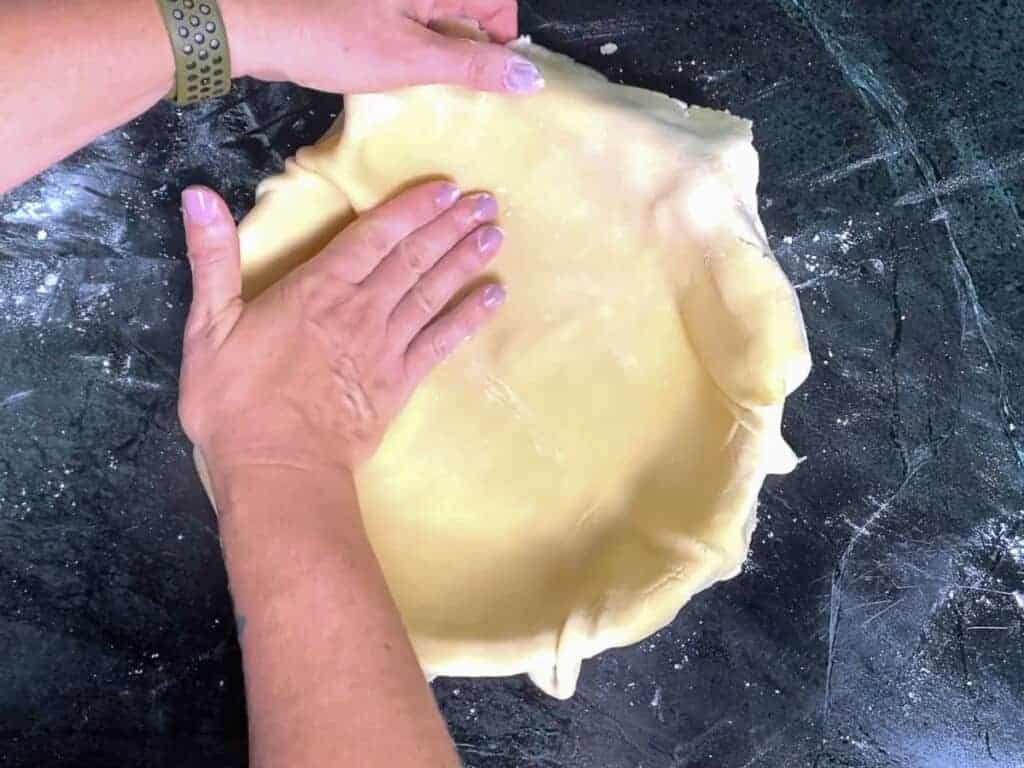
Step 7: Gently press the pie dough into the corners of the pie dish.
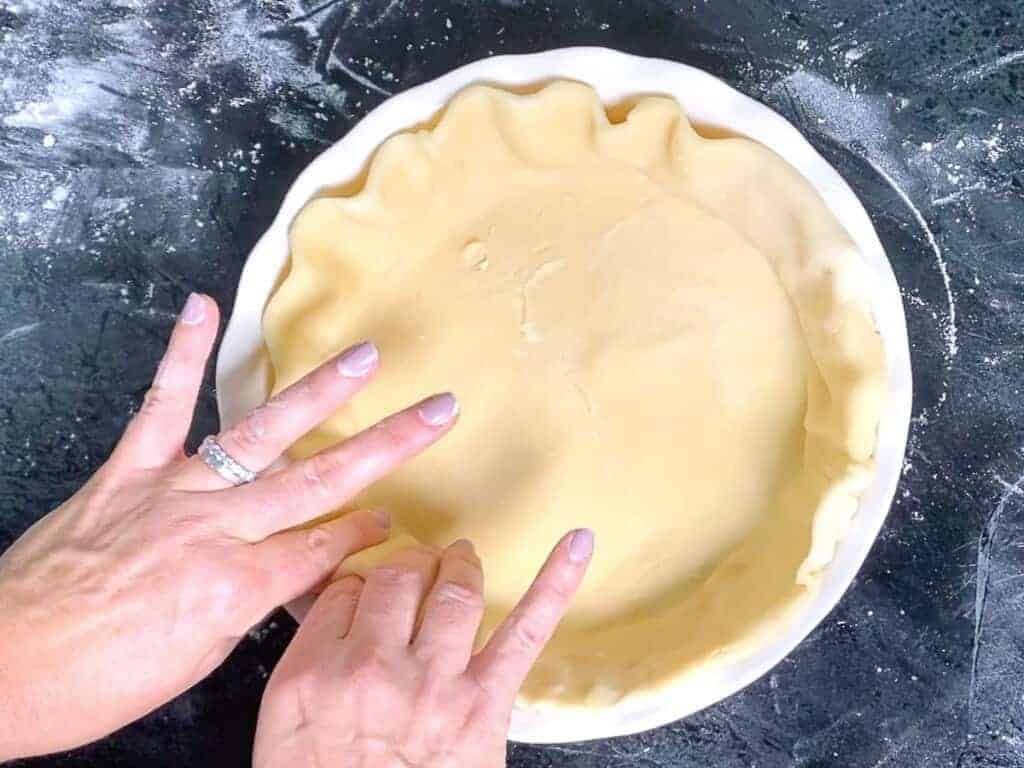
Step 8: Fold the edges of the pie dough under itself.
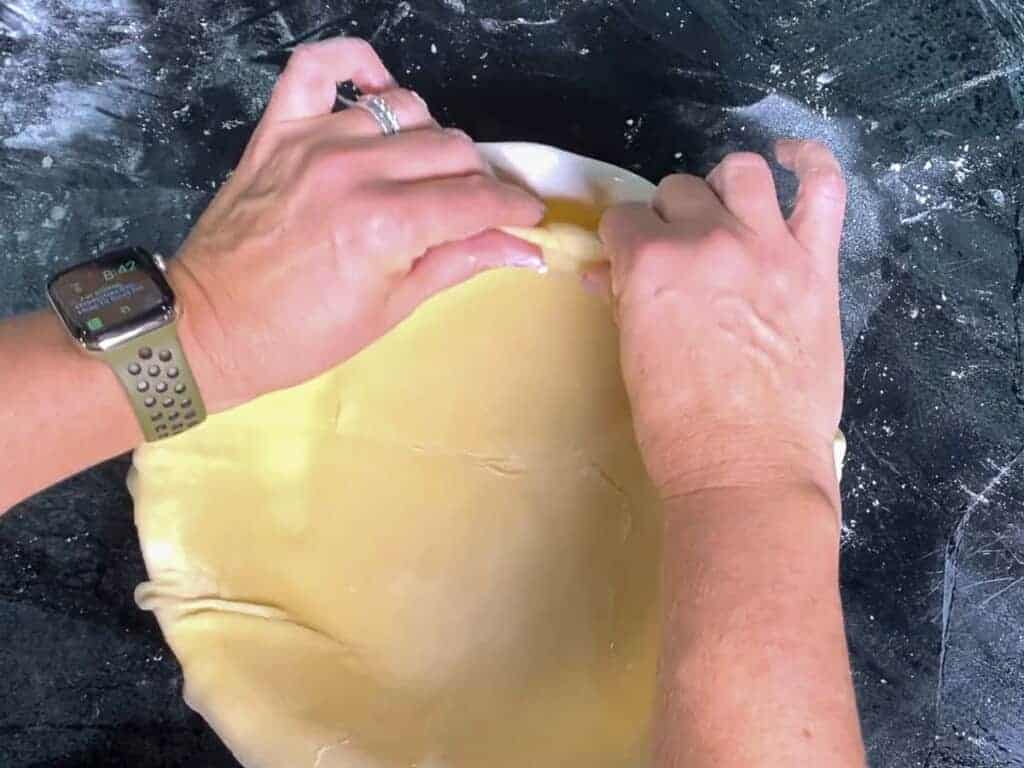
Tuck the edges down into the pie plate.
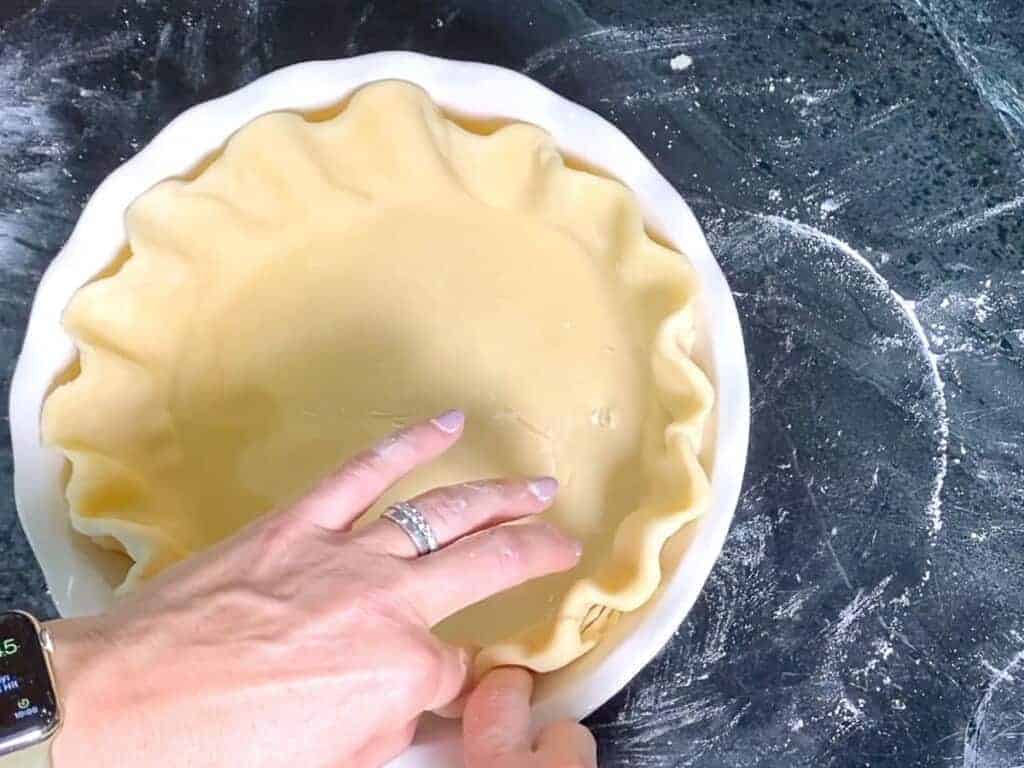
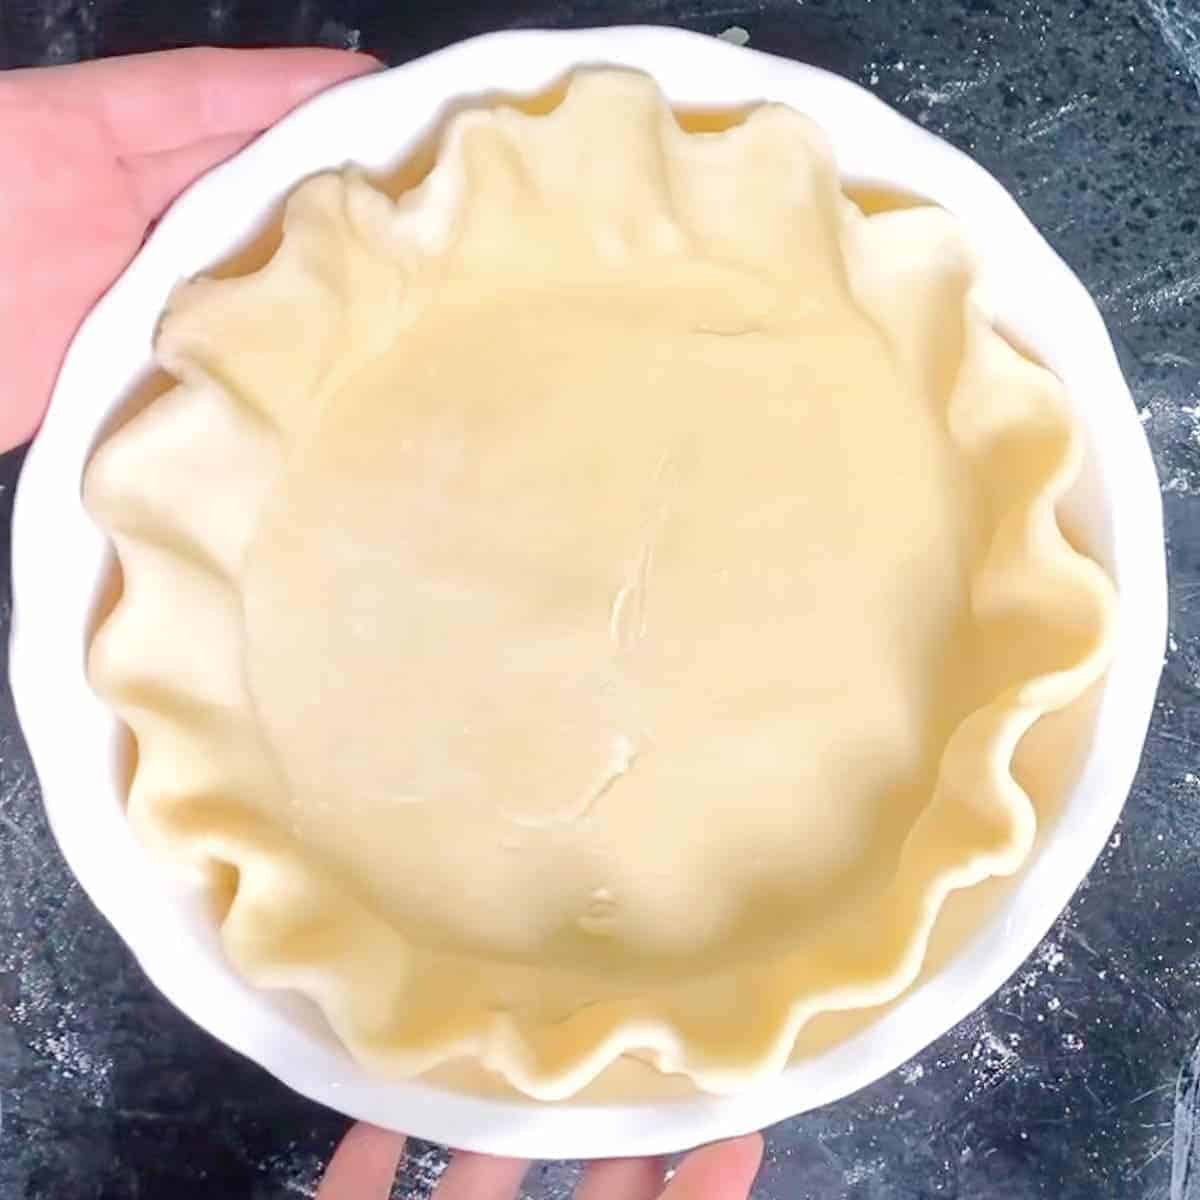
Step 9 Use your fingers to crimp the edges of the pie dough all the way around.
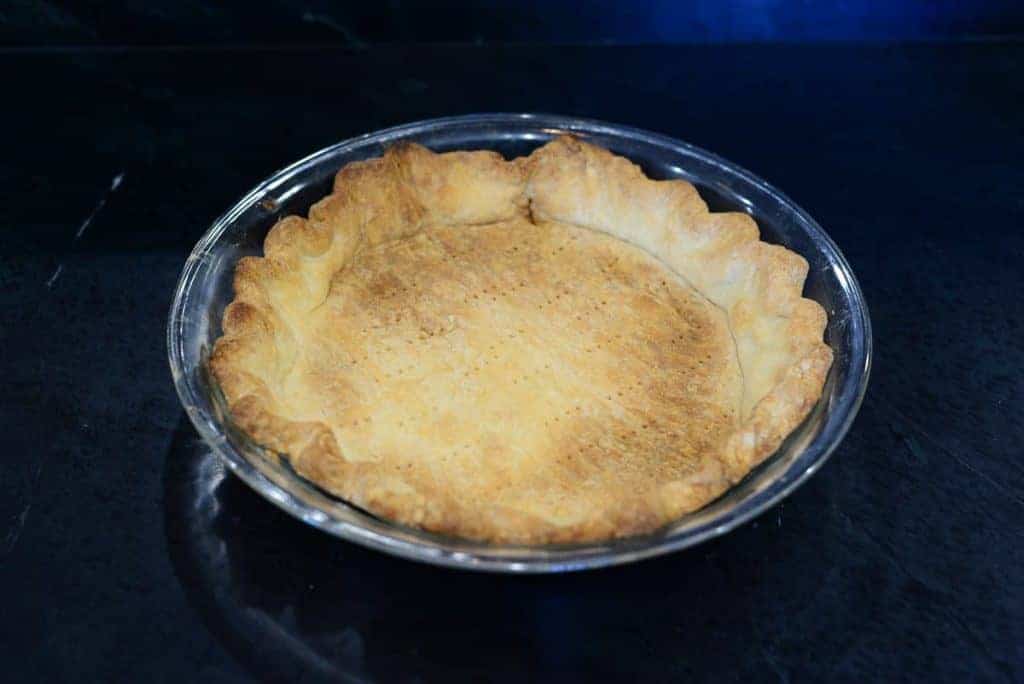
Tips for “blind baking” (pre-baking) a pie crust:
- Refrigerate before baking. After you roll out the pie crust and get it into your pie pan, put it back in the refrigerator for at least 30 minutes. You can also refrigerate the crust overnight.
- Vent the pie dough. Use a fork to pierce the pie dough all the way around.
- Line the crust with parchment paper and add pie weights. You can use ceramic pie weights or dried beans.
- Pre-bake. Preheat the oven to 400℉. Bake for 10-12 minutes. Bake time may vary, so keep an eye on the color of the crust.
PRO TIP: I use ceramic pie weights. Weighting the crust ensures that it doesn’t puff up during the baking process.
Other Pie Recipes To Try
Basic Buttermilk Pie Crust
Equipment
- food processor (affiliate link)
Ingredients
- 2 ½ cups all purpose flour
- 2 tbsp sugar (affiliate link)
- ¾ tsp kosher salt (affiliate link)
- 1 cup unsalted butter, diced and very cold
- ½ cup buttermilk
- additional flour, for rolling
Instructions
- Combine the dry ingredients. Add the flour, salt, and sugar to a food processor bowl with the metal blade. Pulse a few times to blend dry ingredients.2 ½ cups all purpose flour, ¾ tsp kosher salt, 2 tbsp sugar
- Add the butter. Add the cold, diced butter to the bowl. Pulse until mixture resembles coarse sand.1 cup unsalted butter
- Add the buttermilk via the liquid cup dispenser. Pulse until the mixture just starts to come together.½ cup buttermilk
- Turn out the dough out onto a lightly floured surface and smooth any stray pieces together. Knead a few times.
- Chill. Wrap in plastic wrap and refrigerate overnight. (At least 4 hours)
Ready To Roll Out Your Pie Crust
- Remove the pie dough from the refrigerator and let if come to room temperature for about a half hour.
- Flour your work surface and roll out the pie dough. You'll want a 12 to 14-inch round dough so that you have enough room to tuck the edges under.
- Place your pie dough in your pie dish.
- Chill the pie dough one more time before filling it with the pie filling.
- Add the pie filling to pie dough.
- Bake the pie according to your type of filling.
How To Pre Bake a Pie Crust
- Start with pie dough. Follow the instruction for making pie dough. Chill the dough unfilled pie crust for at least 30 minutes to 2 hours.
- Preheat the oven to 400°F
- Refrigerate before baking. After you roll out the pie crust and get it into your pie pan, put it back in the refrigerator for at least 30 minutes. You can also refrigerate the crust overnight.
- Vent the pie dough. Use a fork to pierce the pie dough all the way around.
- Line the crust with parchment paper and add pie weights. You can use ceramic pie weights or dried beans.
- Pre-bake. Preheat the oven to 400℉. Bake for 10-12 minutes. Bake time may vary, so keep an eye on the color of the crust.
Video
Laura’s Tips + Notes
YOUR OWN NOTES
Sign In to add your own private notes


Can you roll out pie crust in pan and then just add filling and bake it?
Kitana,
Yes, I bake my pies this way often. I give the pie a hot start in the oven when using this method. Start the oven at 450F, put the pie into the oven, bake it for 10 minutes, and then turn the oven down to 350F.
You left out a very important and necessary step when pre baking (blind baked) the crust. It must be first covered in parchment paper and then weighted down with pie weights or dry rice or dry beans to bake it first. If that step is skipped the entire crust will shrink down below the edges once you try to bake the pie with the filling. The entire top crimped edge of the crust will disappear under whatever filling is being used. No more pretty edge or delicious tasting brown pastry. If you’re the expert you suggest you are then you should include that step of pre baking a crust.
Ashley,
Thank you for catching this and bringing it to my attention…I did put that in the blog post but forgot to add those details to the recipe card. I will update it now. 🙂